8 Yoga Poses for Lower Back Pain
- Faith Barbara
- May 10, 2022
- 6 min read
Low back pain is a common ailment that so many of us experience in our lifetime. We spend a lot of our time sitting, whether it be at a computer or driving on our long commute to work. The truth is our bodies are not designed to sit as much as we do; and when we allow ourselves to be stagnant for too long, our low back takes the brunt of the strain.
More often than not, low back pain is a direct result of tight hips. When we sit, we force our hips into a flexed position which shortens the muscles. When our hips get tight, our posture is not optimal, and our low back suffers. But that's where yoga can help! Stretching the hips, mobilizing the spine, and stimulating blood flow are all easy fixes for your low back pain that can be accomplished through a consistent yoga practice.
Below are 8 simple but, effective yoga poses that you can practice to help alleviate back pain and keep you feeling your best!

APANASANA (KNEES TO CHEST POSE)
This relaxing, supine yoga pose is a wonderful way to lengthen the low back and stretch the glutes. Knees to chest pose can be done first thing in the morning before you even get out of bed. It provides a gentle release for the low back & can even increase hip mobility. You can even add a gentle rock from side to side while in this pose to gently massage the sacrum and lumbar spine.

How to do it: Bring yourself to lie all the way down onto your back. Start to hug your knees into your chest, wrapping your hands around your shins. Try to keep your shoulders and low back grounded to achieve a lengthening sensation in the back. Close your eyes and take 3-5 deep breaths. To get a deeper stretch, you can try hugging one knee into the chest and keeping the opposite leg extended in front of you.

2. CONSTRUCTIVE REST POSE
This is a wonderful restorative pose to rest in if you're experiencing back pain. With this particular pose, you position yourself in a way that allows the body to completely let go. You can find a deeper connection to your body while gravity does all the work for you. Constructive rest pose can relax your psoas muscles/hip flexors with ease and without you having to force yourself into a restful position.
How to do it: Begin lying down on your back. Bend your knees and place the soles of your feet down slightly wider than hip width distance apart. Simply allow your knees to fall into each other. Keep your shoulders relaxed away from your ears. Place one hand on your heart and the other on your low belly. Close your eyes and breathe. Focus on the breath, feeling the rise and fall of your belly and chest as you breathe. Stay in this position for as long as you need.

3. ARDHA ANANDA BALASANA (HALF HAPPY BABY POSE)
This simple reclined posture is a great way to open up the hips and promote relaxation. It's a lot easier on the joints making it a gentler posture for beginners. Half Happy Baby also stretches the inner thigh & groin, lengthens the spine, & eases lower back tension.
How to do it: Lie on your back. Bend your right knee and place the sole of your right foot down. Hug the left knee into your chest. Grasp the sole of your left foot with your left hand. Open the left hip & use your left hand to draw your left knee down towards your armpit. Hold for 3-5 breaths. Change sides.

4. SUPTA MATSYENDRASANA (SUPINE SPINAL TWIST)
This reclined pose involves a rotation of the spine and can provide a gentle release for the low back. It stretches the low back and surrounding regions like the glutes & obliques. Supine spinal twists are a simple but, effective way to improve spinal mobility.
How to do it: Lie on your back with the legs extended in front of you. Hug the left knee in towards the chest. Take a deep inhale. As you exhale, use your right hand to push the left knee across the body and over to the right. Extend your left arm out to the side. Option to keep your gaze up towards the sky or bring it over your left shoulder. Breathe deeply into the twist. Hold for 3-5 breaths and change sides.


5. MARJARYASANA/BITILASANA (CAT/COW)
These are common warm up poses used in the beginning of a yoga practice to help warm up the spine & body. It often involves one fluid motion as you arch and round the spine, connecting your inhales and exhales to your movement. Adding this movement into the spine is a great way to increase spinal flexibility & stretch the muscles in your back to release tension and stiffness.
How to do it: Come over to your hands and knees into an all-fours position. Align your shoulders with your wrists and stack your hips above your knees. Your knees should be about hip-width distance apart. On an inhale, arch the spine, drop your belly, push your chest forward and gaze up for Cow pose. On an exhale, press firmly into the hands, round through the upper back, tuck the tailbone under, and draw your chin to your chest for Cat pose. Flow through this for about 6-8 rounds. Inhale into Cow. Exhale into Cat. When finished, return to a neutral spine.

6. ANJANEYASANA (LOW LUNGE)
This foundational yoga pose is a great way to target the hip flexors. If you spend a lot of time sitting, this is one of the best ways to lengthen the front side body & improve your standing posture. In a low lunge, the idea is to press the hips forward & down to isolate & stretch your hip flexors.
How to do it: From a neutral all-fours position, hug the left knee into the chest and step the left foot forward in between your hands. Adjust your stance, slide the right knee back until you feel a comfortable stretch in the front of the right thigh and hip. You can keep the right toes untucked or you can tuck them under to stretch the foot and support your knee. Come onto the fingertips or place your hands on a couple of yoga blocks to keep the chest lifted. Press firmly into the left foot as you press your hips forward and down. Keep your left knee in line with your left ankle or slightly behind. Hold for 3-5 breaths. Step the left knee back to your all-fours position and change sides.

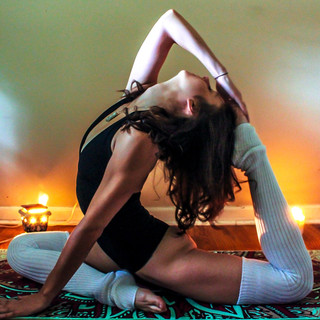
7. PARIVRTTA JANU SIRSASANA (REVOLVED HEAD-TO-KNEE POSE)
This grounded, seated pose is another great stretch for the inner thighs, hips, and groin. Revolved Head-to-Knee involves a side bending motion that also targets the quadratus lumborum muscles. These muscles start at the pelvis and run up to the lowest rib. They can become short and stiff if you spend a lot of time sitting and can cause pain in the lower back and legs.
How to do it: Begin in a seated position at the center of your mat. Extend the legs out wide into a V-shape, going as far as is comfortable for you. Bend your left knee and place the sole of your left foot to your inner right thigh. With an inhale, extend your arms up towards the sky. As you exhale, lean your torso as far to the right as possible. Place your right forearm to the floor inside your left leg. Reach your left arm up and over, reaching your left fingers for your right toes. Roll your left shoulder open, lift your gaze up and keep your shoulders square. Hold for 3-5 breaths. Lift back up to center & change sides.

8. BALASANA (CHILD'S POSE)
This resting pose promotes relaxation of the entire body by stimulating your parasympathetic nervous system. Child's pose is not only a great way to tune inward, but it also provides a gentle stretch for the back, hips, thighs, and shoulders. Taking a wide-legged variation allows for a deeper lengthening sensation in the low back.
How to do it: Come to your hands and knees. Spread your knees as wide as your mat & press your hips back towards your heels. Start to walk your hands forward to extend the arms straight out in front of you. Allow your belly to rest in between your thighs and gently rest your forehead all the way down. Close your eyes and breathe. You can stay in this position for as long as feels good for you. The key is to breathe deeply. With each exhale, allow your body to melt into the surface beneath you.
The key to healing the body is consistency. All of these yoga postures are safe for daily practice. Over time, as your body softens, you will start to feel relief. Dedicate a few minutes a day for yourself to stretch & relax!
Practice online with me! Use this 20-minute class to improve hip flexibility & alleviate back pain.
Stay well & keep shining, my dear friends.
-Faith


Comments